

Views: 0 Author: Site Editor Publish Time: 2025-12-15 Origin: Site


You might feel worried about solar panel wiring. This is normal if you have never worked with electricity. Safety is very important. Picking the right materials and methods for solar panel wiring helps a lot. Knowing about series and parallel wiring does more than help you connect panels; it changes how much energy you get and how safe your system is. For example:
If your panel setup matches your inverter’s MPPT range, your system works well.
Series wiring is easy, but you lose energy if one panel stops working.
Parallel wiring allows your system to keep functioning if one panel has trouble, but you need thicker wires and must be extra careful for safety.
With a simple guide, you can wire your own solar panels. You can feel confident about each step.
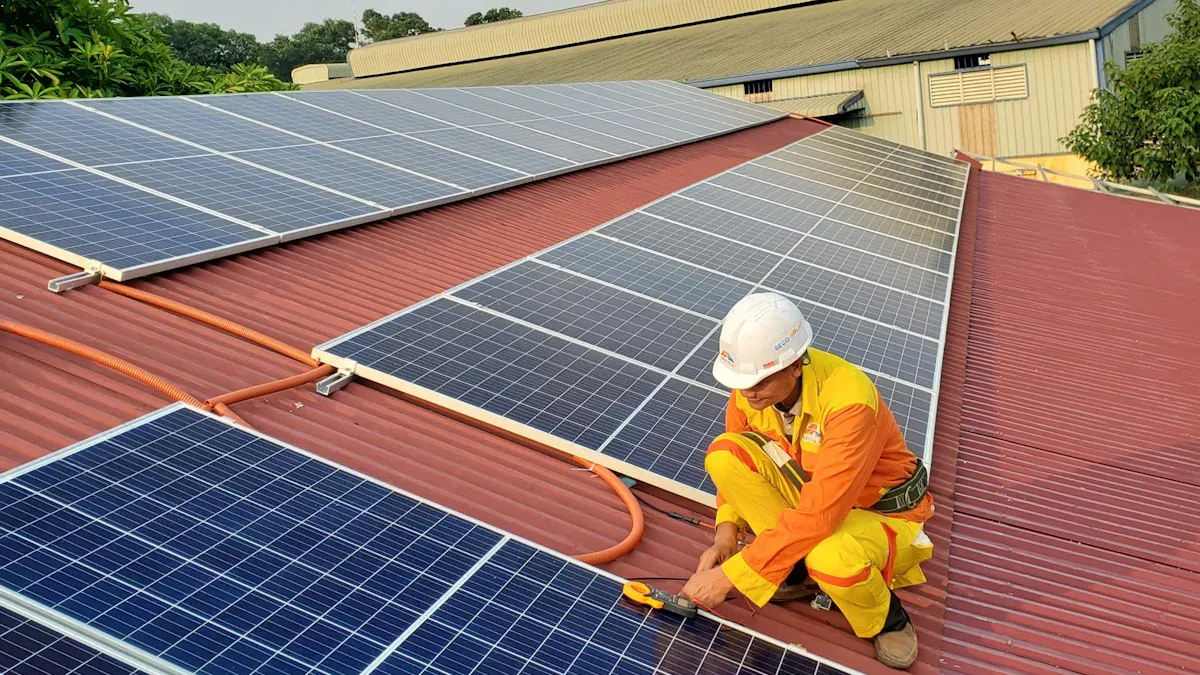
Safety is very important when wiring solar panels. Always wear gloves that protect you. Wear safety glasses to keep your eyes safe.
Know the difference between series and parallel wiring. Series wiring makes voltage higher. If one panel fails, you can lose power. Parallel wiring keeps things working if one panel has problems.
Pick the right materials for your setup. Use good connectors like MC4. Make sure your cables are the right thickness. This stops cables from getting too hot.
Plan your installation step by step. Think about how much energy you need. Check how much sunlight your panels will get. This helps you pick the best panel setup.
Label every wire and connection clearly. This makes fixing things easier later. It also keeps you safe when making repairs.
Test your system often to make sure it works. Use a multimeter to check voltage and current. Look for loose wires or damage every six months.
If you do not know what to do, ask a professional. They will make sure your setup is safe. They also know local rules.
Keep your wires tidy and neat. Use cable ties and conduits to protect wires. This stops wires from getting tangled or damaged by weather.
When you start with solar panel wiring, you need to know the main parts and how they work together. Let’s break it down so you can see how each piece fits into your solar panel system.
Here’s a quick look at the most important parts you’ll use:
Component | Role |
|---|---|
Solar Panels | Collect sunlight and turn it into electricity. |
Inverter | Changes the electricity from DC (direct current) to AC (alternating current) for your home. |
Battery | Stores extra energy for use at night or during cloudy days. |
Charge Controller | Keeps the battery safe by controlling how much power goes in or out. |
PV1-F Solar Cable | Connects all the parts together and carries electricity safely. |
You use solar panels to catch sunlight. They turn that sunlight into electricity. This is the first step in making your own power.
The solar inverter takes the electricity from your panels and changes it into a form your home can use. Most homes use AC power, but solar panels make DC power. The inverter makes sure everything works together.
A battery stores the energy your panels make. You can use this stored power when the sun isn’t shining. This helps your solar panel system keep running even at night.
The charge controller acts like a guard for your battery. It stops the battery from getting too much power, which can damage it. It also makes sure the battery doesn’t send out too much power at once.
You use PV1-F solar cable to connect all the parts. This cable is strong and safe for outdoor use. It helps your solar panel system work smoothly.
You can connect your solar panels in two main ways: series or parallel. Each way changes how much voltage and current you get.
When you wire panels in series, you connect the positive end of one panel to the negative end of the next. This setup adds the voltage of each panel together, but the current stays the same. For example, if you connect three 12V panels in series, you get 36V, but the current does not increase.
Configuration | Voltage (V) | Current (A) |
|---|---|---|
Series | 36 | 5 |
Series wiring works well if you need higher voltage for your solar inverter. But if one panel stops working, the whole string can lose power.
In parallel wiring, you connect all the positive ends together and all the negative ends together. This keeps the voltage the same as one panel, but the current adds up. For example, if you connect three 12V panels in parallel, you still get 12V, but the current triples.
Configuration | Voltage (V) | Current (A) |
|---|---|---|
Parallel | 12 | 15 |
Parallel wiring helps your solar panel system keep working even if one panel has a problem. You need thicker cables for this setup because the current is higher.
Tip: Always check your solar inverter’s voltage range before choosing series or parallel wiring. This helps your system run safely and efficiently.
Before you start solar panel installation, you need to figure out how much energy your home uses. This step helps you pick the right number of panels and the best setup. You can grab your electric bill and look for your average monthly usage. That number gives you a starting point. But there’s more to think about:
Your energy usage changes during the year. You might use more power in summer or winter.
Sun exposure matters. Homes in sunny places get more energy from solar panels.
Shading from trees or buildings can lower your system’s output.
The amount of sunlight changes with the seasons.
If you check these things, you’ll know what size system you need. You’ll also avoid surprises after installing solar panels.
Now you get to decide how to wire your panels—series or parallel. This choice affects how your system works. Series wiring boosts voltage, which works well if you have lots of sunlight and no shade. Parallel wiring increases current and keeps your system running even if one panel gets shaded.
The best setup depends on your energy needs and your location. Here’s a quick look at the pros and cons:
Configuration | Advantages | Disadvantages |
|---|---|---|
Series | Maximizes energy output in unshaded spots | Weakest panel limits performance; shade hurts more |
Parallel | Handles shade better; panels work alone | Needs thicker cables; can lose more power in wires |
You should also think about sunlight availability and shading. Series works best if your roof gets even sunlight all day. Parallel is better if you have trees or chimneys that cast shadows. If you run wires a long way, series might lose more power. Parallel setups can help with shorter wiring runs.
Tip: Always match your wiring choice to your inverter’s needs and your home’s sunlight conditions. This helps your solar panel installation work smoothly.
Planning where to put your panels makes a big difference. You want to get the most sunlight and keep everything safe. Here’s how you can do it:
Set up mounting rails to hold your panels steady and at the right angle.
Use clamps and fasteners to lock panels in place.
Adjust the tilt so panels catch the most sun.
Make sure the foundation or supports are strong enough for wind and snow.
Add flashing and waterproofing if you’re installing solar panels on a roof.
Think about tracking systems if you want panels to follow the sun.
Organize cables with junction boxes and cable ties for safety.
Check your roof’s strength before you start. Look at local weather—wind and snow can affect your setup. Pick a mounting system that fits your area. Make sure you can reach the panels for cleaning and repairs. Always follow local building codes and get permits if needed.
️ Careful planning helps you avoid problems and keeps your solar panel installation safe and efficient.
Before you start solar panel installation, you need the right tools and materials. This helps your system stay safe and work well. It also makes it easier to fix later. Let’s see what you should have before wiring.
You do not need fancy tools, but you need the right ones. These tools make wiring requirements for solar panels much safer and easier:
Wire Strippers
Wire strippers take off the insulation from solar cables. They help you cut the wire cleanly without hurting the inside wire.
Screwdrivers
Screwdrivers help you tighten connections and put on mounting hardware. Get a set with different sizes for different jobs.
Multimeter
A digital multimeter checks voltage, current, and continuity. You use it to test your wiring and make sure it works before finishing solar panel installation.
Safety Gear
Safety is always important. Wear insulated gloves to protect your hands from electric shock. Safety glasses keep your eyes safe when you cut or drill. If you work on a roof, wear a hard hat and shoes that do not slip.
Tip: Use a torque wrench when you tighten bolts. This tool keeps you from making bolts too tight or too loose. That way, your equipment stays safe.
You need more than just tools. The right materials help you meet wiring requirements for solar panels and keep your system working well.
Connectors join wires and panels together. MC4 connectors are best for solar panels because they lock tightly and keep water out. For battery connections, use ring terminals. These make a strong and safe connection.
Fuses keep your system safe from too much current. If too much current flows, the fuse breaks the circuit and stops damage. Always match your fuse size to your wire size and system voltage.
Mounting hardware holds your panels in place. You need rails, clamps, and bolts that fit your roof or ground setup. Make sure everything is strong enough for wind and weather.
Here’s a table to help you pick the right materials:
Category | Recommendation |
|---|---|
Wire Gauge (AWG) | Use 10-14 AWG for solar panels; 2-4 AWG for battery connections. |
Cable Length | Pick wire gauge so voltage drop stays below 3% for best results. |
Temperature Rating | Cables should work from -40°F to 194°F for tough weather. |
Connector Types | Use MC4 connectors for solar panels; ring terminals for batteries. |
Insulation Type | THWN-2 or USE-2 for outside; XLPE for wires underground. |
Voltage Rating | At least 600V for homes; 1000V or 2000V for big systems. |
Certification | Pick UL-listed cables that follow NEC Article 690 rules for safety and good performance. |
️ Note: Always check that your cables and connectors are UL-listed and follow local codes. This keeps your solar panel installation safe and up to standard.
When you have these tools and materials, your installation will go smoothly and safely. You will meet all wiring requirements for solar panels and avoid common problems later.

Wiring solar panels can feel exciting, but you need to stay safe every step of the way. Electricity and heights both bring risks. If you follow some simple safety rules, you can protect yourself and make your project a success.
You want to keep yourself safe while working with solar panels. Here are some important tips:
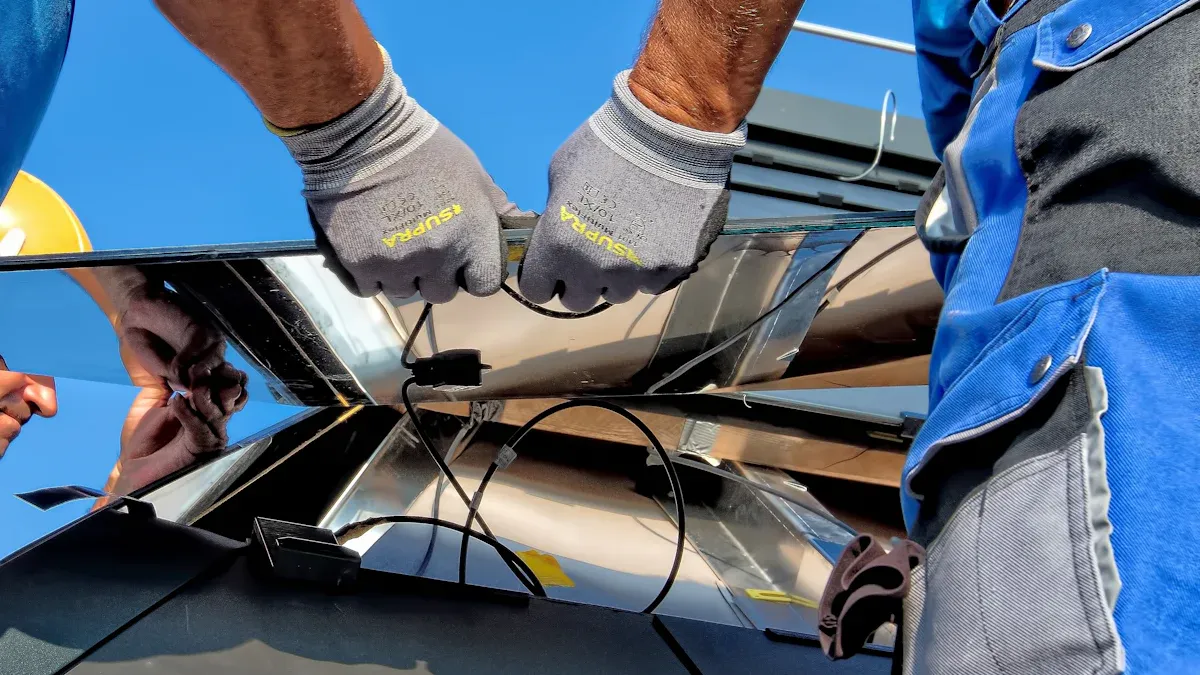
Wear electrical insulated gloves. These protect your hands from sharp edges and electric shocks.
Put on a protective suit. A snug suit keeps you from getting caught on anything and shields your skin.
Use a safety rope. If you work on a roof, always secure yourself with a rope to prevent falls.
Check your ladder. Make sure your ladder stands firm and sits on a flat surface. Never climb a wobbly ladder.
Lift panels with a buddy. Solar panels can be heavy and awkward. Work with a partner to lift and move them safely.
Tip: Always double-check your gear before you start. A quick check can prevent accidents.
Electricity from solar panels can surprise you, even on cloudy days. You need to treat every wire with respect. Here’s a table to help you remember the most important electrical safety steps:
Safety Guideline | Description |
|---|---|
Compliance with Standards | Follow all national and local rules for wiring and installation. |
Proper Wire Selection | Use PV wire with strong insulation made for solar work. |
Personal Protective Equipment (PPE) | Wear insulated gloves, safety glasses, and non-conductive boots. |
Lockout/Tagout Procedures | Use lockout devices and tags to keep circuits off while you work. |
Before you touch any wires, disconnect and de-energize the system. Use a lockout device so no one can turn it back on by mistake. Attach your own tag that says “Do Not Operate” with your name and the date. This keeps everyone safe.
You should also wear safety glasses with side shields, a hard hat, and fire-resistant clothing. These protect you from sparks, falling tools, and other hazards. Always use high-quality connectors like MC4 and keep your cables neat and out of the way.
⚡ Note: Even a small amount of sunlight can make your panels produce electricity. Always treat the system as if it’s live.
Never connect your solar panel wiring to the electrical grid while you work. This is one of the most important safety rules. Solar PV systems can carry enough voltage to cause serious injury, even in low light. If you connect to the grid too soon, you risk electric shock or arc-flash.
Always make a project plan before you start. This helps you spot and avoid risks.
If you feel unsure, ask an experienced solar contractor for advice.
Treat every wire as if it’s carrying power, just like a utility line.
Make sure all circuits are de-energized before you touch them.
Warning: Never rush to connect your system to the grid. Take your time, check your work, and stay safe.
You’re ready to get hands-on with your solar panel wiring. This step-by-step guide will walk you through how to wire solar panels, making sure you feel confident and safe at every stage. Let’s start with planning your layout, then move on to wiring in series and parallel.
Before you touch any wires, you need a solid plan. Good layout planning helps your solar panel wiring work efficiently and keeps your system safe. Here’s how to wire solar panels with smart layout planning:
Check your site. Walk around and look for the sunniest spots. Avoid areas with shade from trees or buildings.
Watch the sunlight. Notice if anything blocks the sun during the day. Panels need full sunlight for best results.
Pick the right direction and tilt. In the Northern Hemisphere, point your panels south and tilt them to catch the most rays.
Measure your roof or ground space. Make sure you have enough room for all your panels without crowding.
Group panels into strings. Decide how many panels you’ll wire together in series or parallel. Match the voltage to your inverter.
Choose the right wires. Use outdoor-rated, UV-resistant DC wiring. Protect wires with conduit and keep the polarity correct.
Follow safety rules. Insulate all wires, use MC4 connectors, and hire a certified electrician if you feel unsure.
Tip: Always double-check your measurements and panel placement before you start wiring. A good plan saves you time and trouble later.
Wiring in series is one of the most common ways to connect solar panels. You’ll increase the voltage while keeping the current the same. Here’s how to wire solar panels in series, step by step.
Set your panels in the spots you marked during layout planning. Make sure each panel faces the sun and sits at the right angle. Leave enough space between panels for airflow and easy access.
Find the positive (+) and negative (-) terminals on each panel. Connect the positive terminal of the first panel to the negative terminal of the next panel. Keep going until all panels in the string are linked.
Example Series Connection:
Panel | Connects To |
|---|---|
1 (+) | 2 (-) |
2 (+) | 3 (-) |
... | ... |
Use high-quality solar cables and MC4 connectors for each link. Make sure you match the polarity correctly. If you mix up the wires, your system won’t work and could get damaged.
After you connect the panels, check each connection. Tug gently on the wires to make sure they’re tight. Seal any exposed wiring with insulation tape. Route the wires neatly and protect them with conduit if needed.
⚡ Note: Always turn off your system before you touch any wires. Wear insulated gloves and use insulated tools.
Now it’s time to test your work. Grab a digital multimeter and set it to DC voltage. Touch the probes to the ends of your series string. Make sure the panels get full sunlight. The reading should be close to the total open-circuit voltage (Voc) listed on your panels. If you see a number within ten percent of that rating, you did it right.
Steps to Test Voltage:
Set your multimeter to DC voltage.
Connect the probes to the positive and negative ends of the string.
Check the reading in full sunlight.
Compare the result to your panel’s Voc rating.
If the voltage looks off, check your connections and make sure no wires are loose or mixed up.
Wiring in parallel keeps the voltage the same but increases the current. This setup helps your system keep working even if one panel has a problem. Here’s how to wire solar panels in parallel.
Find the positive terminals on all your panels. Use connectors or a junction box to join all the positive wires together. Make sure the connection is tight and weatherproof.
Do the same for the negative terminals. Gather all the negative wires and connect them together using MC4 connectors or a terminal block. Double-check that you don’t mix up the wires.
Parallel Connection Table:
Panel | Positive Terminal | Negative Terminal |
|---|---|---|
1 | Joined | Joined |
2 | Joined | Joined |
3 | Joined | Joined |
After you connect all the positives and negatives, check each wire. Use insulation tape to seal any exposed metal. Route the wires neatly and protect them with conduit. Make sure nothing can pull the wires loose.
️ Tip: Always use MC4 connectors for outdoor connections. They keep water out and hold wires tight.
Testing current is the last step in how to wire solar panels in parallel. Use a multimeter to measure the current output. Set the multimeter to DC current and connect it to the combined positive and negative wires. Do this during peak sunlight hours for the best reading.
Measure the current from each panel separately first.
Look for big differences in current (more than ten percent) between panels. If you see a problem, check for shade, dirt, or loose wires.
Log your readings throughout the day to spot patterns.
If the current matches your system’s needs, you’re ready to move on. If not, clean your panels and check your wiring again.
Note: In parallel wiring, the total current should add up from all panels, but the voltage stays the same as a single panel.
You’ve just learned how to wire solar panels in both series and parallel. Careful planning and testing help your solar panel wiring work safely and efficiently.
Sometimes, you want the best of both worlds. You want higher voltage and more current. That’s when you combine series and parallel wiring in your solar panel system. This setup works great for bigger systems or when you need to match your inverter’s needs.
A series-parallel configuration lets you balance voltage and current. You connect a few panels in series to make a string. Then, you connect those strings together in parallel. This way, you get enough voltage for your inverter and enough current for your battery or home.
Here’s how you can do it:
Connect several panels in series. For each string, link the positive terminal of one panel to the negative terminal of the next. Do this until you have the voltage you want.
Make more strings the same way. Each string should have the same number of panels and the same type of panels.
Connect the positive ends of all strings together. Do the same for the negative ends. Now, your strings are in parallel.
Check that your total voltage and current match your inverter’s Maximum Power Point Tracking (MPPT) range. This helps your system run at its best.
Tip: Always use panels with the same ratings. If you mix panels with different voltages or currents, your system can lose power. Only connect panels with the same current in series. Only connect panels with the same voltage in parallel.
Here’s a simple table to show how this works:
Wiring Type | What Increases? | What Stays the Same? |
|---|---|---|
Series | Voltage | Current |
Parallel | Current | Voltage |
Series-Parallel | Both | - |
Best Practices for Series-Parallel Wiring:
Use panels with the same voltage and current ratings.
Build each string with the same number of panels.
Use MC4 connectors and weatherproof junction boxes.
Label each string for easy troubleshooting.
Double-check all connections before turning on your system.
A series-parallel setup gives you flexibility. You can build a system that fits your roof, your energy needs, and your inverter. You also get a system that keeps working even if one panel has a problem.
⚠️ Note: Always turn off your system before making changes. Wear safety gear and follow all local codes.
Combining series and parallel wiring might sound tricky, but you can do it if you follow each step. Take your time, check your work, and ask for help if you need it. With practice, you’ll wire your solar panels like a pro.
You finished wiring your panels. Now you connect everything together. This step makes your solar energy system work. You link the charge controller, battery, and solar inverter. Your solar panel system can now power your home.
The charge controller keeps your battery safe. It helps your solar energy system run well. You must connect it the right way. Follow these steps:
Connect the charge controller to the battery first. Use stranded copper core wire. Match the positive and negative terminals. Put a fuse between the battery and charge controller for safety.
Next, connect the charge controller to your solar panels. Use MC4 connectors. Make sure you match positive to positive and negative to negative.
Check all connections again. Tighten them so they do not come loose. Label each wire so you know where it goes.
️ Tip: Always connect the battery before the solar panels. This keeps your charge controller safe from power surges.
Your battery saves energy for later. You want a strong and safe connection. Do these steps:
Use thick battery cables. Short cables work best because they lose less power.
Attach the battery cables to the charge controller. Match the terminals—positive to positive, negative to negative.
Put a fuse close to the battery. This protects your solar energy system from too much current.
Check the battery voltage with a multimeter. Make sure it matches your solar panel system needs.
Here’s a quick table to help you remember:
Step | What to Do |
|---|---|
Wire Selection | Use thick, short battery cables |
Fuse Placement | Install fuse near battery terminal |
Polarity Check | Match positive and negative ends |
Voltage Test | Use multimeter to check battery |
⚡ Note: Keep wires away from hot surfaces and sharp edges. This stops damage and keeps your solar energy system safe.
The solar inverter changes DC power from your battery into AC power for your home. You need to connect it carefully. Here’s how:
Connect the battery to the solar inverter with thick cables. Keep the cables short for best results.
Read your solar inverter manual. Some models need a fuse between the battery and inverter. Add one if needed.
Ground the solar inverter well. Good grounding protects your solar energy system from electrical problems.
Use strong connectors like MC4 or Amphenol for all connections. Secure the mounting and label everything clearly.
If you connect to your home’s electrical system, hire a licensed solar electrician. They know the National Electrical Code and keep your solar panel system safe.
Tip: Label all junction boxes and disconnects. This makes future repairs easy and safe.
You have now connected your solar panel system to the charge controller, battery, and solar inverter. Your solar energy system is ready to give clean power to your home. Careful wiring and good planning help your solar inverter work well and keep your solar energy system safe for years.
You finished wiring your solar panels. Now, you want to make sure everything works safely and gives you the power you expect. Testing and troubleshooting help you catch problems early and keep your system running strong. Let’s walk through how you can check your work, spot common mistakes, and fix issues like a pro.
Testing your solar panel system is like giving it a health check. You want to know that every part works as it should. Here are the main ways you can test your system:
Testing Method | Purpose |
|---|---|
Visual Inspection | Spot damage, discoloration, or loose wires. |
Voltage Testing | Check if you get the right voltage and find open circuits. |
Current Testing | Make sure current matches your system’s rating and see if parallel strings are balanced. |
Continuity Testing | Find breaks in wires or bad connections. |
Insulation Resistance Testing | Catch insulation problems before they cause leaks or shocks. |
Ground Fault Testing | Check for leaks and make sure your system is grounded. |
Thermal Imaging | Spot hot spots or overheating parts. |
Power Quality Analysis | Look for voltage dips, surges, or other power issues. |
Start with a visual check. Look for cracked panels, burnt spots, or wires that look worn out. Next, use your multimeter to test voltage and current. Compare your readings to the numbers on your panel labels. If you see a big difference, something might be wrong.
Don’t forget to check for continuity. Set your multimeter to the continuity setting and touch both ends of a wire. If you hear a beep, the wire is good. If not, you may have a break or a loose connection.
Tip: Always test your system in full sunlight for the most accurate results.
Even careful people make mistakes when wiring solar panels. Knowing what to watch for helps you avoid trouble. Here are some of the most common wiring mistakes:
Connecting too many or too few panels in a string. This can cause voltage mismatches and damage your inverter.
Messy or unprotected cables. Poor cable management can lead to insulation breakdown and even fires.
Using the wrong connectors or crimping them badly. This creates high resistance and wastes power.
Choosing wires that are too thin. Undersized wires can overheat and lose power.
Skipping proper grounding. Bad grounding can make your system unsafe.
Mixing up inverter connections. Wrong connections can stop your system or cause grid problems.
Forgetting fuses or breakers. Without overcurrent protection, your system can get damaged.
Ignoring local electrical codes. This can lead to failed inspections or legal trouble.
Not labeling wires and parts. Poor labeling makes repairs and emergencies harder.
You might also notice signs that something is wrong:
Your system makes less power than expected.
Lights flicker when you use solar power.
Circuit breakers trip often.
You smell burning plastic near your wiring.
⚠️ Warning: If you see, hear, or smell anything unusual, turn off your system and check your wiring right away.
You found a problem. Don’t worry! You can fix many solar panel wiring issues yourself. Here’s a simple troubleshooting checklist for beginners:
Look at your wiring every month. Check for loose connections, worn insulation, or signs of damage.
Watch your inverter display. Many inverters show error codes if something goes wrong. Write down any messages you see.
Seal all conduit connections. Make sure water and dust can’t get inside your wiring.
Test your ground connections once a year. Look for rust or loose bolts. Clean and tighten as needed.
Keep a logbook. Write down any changes, repairs, or drops in power. This helps you spot patterns and fix problems faster.
If you find a loose wire, turn off your system before you touch anything. Tighten the connection and check it again. If you see a damaged cable, replace it with the right type and size. Always use MC4 connectors for outdoor work.
️ Tip: If you feel unsure or see a big problem, call a licensed solar electrician. Safety comes first.
You can keep your solar panel system running well with regular checks and quick fixes. Stay curious, keep learning, and enjoy the power you make from the sun!
You want your solar panel installation to stay safe and easy to manage. Labeling wires helps you do both. When you add clear labels, you know exactly what each wire does. This makes repairs and upgrades much easier. You also lower the risk of accidents because everyone can see warnings and important details.
Here’s a table showing some useful labels and why you need them:
Label Type | Purpose |
|---|---|
Voltage Rating Labels | Show the voltage at key points so you avoid electrical accidents. |
Warning Signs | Tell you about hazards like “DANGER: HIGH VOLTAGE.” |
Disconnect Labels | Mark where you can safely turn off parts of the system. |
Arc Flash Warning Labels | Warn you about arc flash risks and remind you to take precautions. |
PPE Requirement Labels | List the safety gear you need for each area. |
Chemical Hazard Labels | Point out places with dangerous chemicals. |
System Component Labels | Give specs and ratings for major parts to help with maintenance. |
If you use labels, you make your solar panel installation safer for everyone. You also save time when you need to fix or check something.
Messy wires can cause problems and make your solar panel installation look sloppy. You want neat connections so your system works well and stays safe. Start by using the right wire types. PV wire works best outdoors, while THWN is good for indoor wiring. MC4 connectors help you join wires securely and keep out water.
Check out these techniques for neat and secure connections:
Technique | Description |
|---|---|
Use of specific wire types | PV wire for outside, THWN for inside. |
Connectors | MC4 connectors for strong, weatherproof joins. |
Junction boxes | Use proper boxes and connect to a main grounding rod. |
Grounding practices | Ground your solar panel at the main panel, not a separate rod. |
Conduit requirements | Use flexible conduit that meets code for PV DC wires. |
Color coding | Pick different colors for wires so you don’t get confused. |
When you keep wires tidy and connections tight, you lower the chance of shorts or fires. You also make future repairs much easier.
Outdoor wiring faces rain, snow, and sun. You want to protect your solar panel installation from weather damage. Start with high-quality zip ties that can handle heat and cold. Organize your wires with cable trays, conduits, or clips. This keeps them off the ground and away from water.
Here are some smart ways to protect your wiring:
Use weather-resistant zip ties for long-lasting support.
Organize wires with trays, conduits, or clips to prevent tangling.
Install wire guards to shield cables from snow and ice.
Check your system after big storms or heavy snow.
Seal all connections with waterproof sealant to block moisture.
If you follow these steps, you keep your solar panel installation working through every season. You also avoid costly repairs and keep your power flowing.
️ Tip: Always check your wires after installing solar panels and after bad weather. Early fixes stop big problems later.
You might feel happy to do your own solar panel installation. Many steps are easy if you use a guide. But sometimes, you need help from a professional. Calling a pro can stop problems and keep your home safe.
Here are some times when you should ask a licensed installer or certified electrician for help:
You want to connect your solar panels to your home’s electrical system.
You see wiring diagrams or instructions that confuse you.
You find damaged wires or loose connections after you finish.
You need to work close to your main electrical panel.
You are not sure about building codes or permits.
You want to make sure your system passes inspection.
Certified electricians know how to install wiring safely. They can connect solar panels to your home’s electrical system without causing fire or shock. Licensed installers also know about roofing and local rules. They make sure your solar panel installation follows all safety rules.
Here is a table to help you know when to call a pro:
Situation | Why Call a Pro? |
|---|---|
Connecting to home wiring | Safety and proper operation |
Unsure about codes or permits | Compliance with local laws |
Roof work or tricky mounting | Prevent leaks and damage |
System inspection or approval | Pass official checks |
Insurance and warranties | Protect your investment |
Licensed professionals have insurance. This keeps you safe if something goes wrong during solar panel installation. They also handle permits and inspections, so you do not have to worry about paperwork. Most pros give warranties and keep records of their work. If you need repairs later, you will not have to worry.
Solar technology changes quickly. Professionals learn new safety rules and tools. They take classes and know how to find problems before they get worse.
️ Tip: If you ever feel unsure or face a problem you cannot fix, call a licensed installer. You keep your home and your money safe.
You can do many parts of solar panel installation yourself. But if you need expert help, do not wait to call. A professional makes sure your system works well and lasts a long time.
You’ve learned how to wire solar panels step by step. Always double-check your work—make sure every connection is tight, all parts are grounded, and safety labels are easy to see. Watch out for common mistakes like using the wrong tools or skipping inspections. Stay safe and take your time. You can do this, even if you’re just starting out! Got questions or want to share your solar story? Drop a comment below.
You should check all connections for tightness. Use a multimeter to test voltage and current. Look for frayed wires or loose ends. If you see sparks or smell burning, turn off your system and call a pro.
You should avoid mixing brands. Panels with different voltages or currents can cause problems. If you must mix, make sure the ratings match. Always read the panel labels before wiring.
Incorrect wiring can stop your system from working. You might damage your inverter or battery. You could also risk electric shock. Always double-check your connections and use labels.
Most places require a permit for solar panel installation. You should check with your local building department. Permits help keep your system safe and up to code.
You should inspect your wiring every six months. Look for loose connections, dirt, or damage. Clean your panels and check your inverter display for errors.
Wire size depends on your system’s voltage and current. Most home systems use 10-14 AWG for panels. Use thicker wire for batteries. Always follow manufacturer recommendations.
You can install solar panels if you follow safety rules and local codes. Some steps, like connecting to your home’s electrical system, need a licensed electrician. If you feel unsure, ask a pro.
Solar panels make less power when clouds block the sun. Your system might still work, but you get lower output. Batteries help you store energy for cloudy days.


